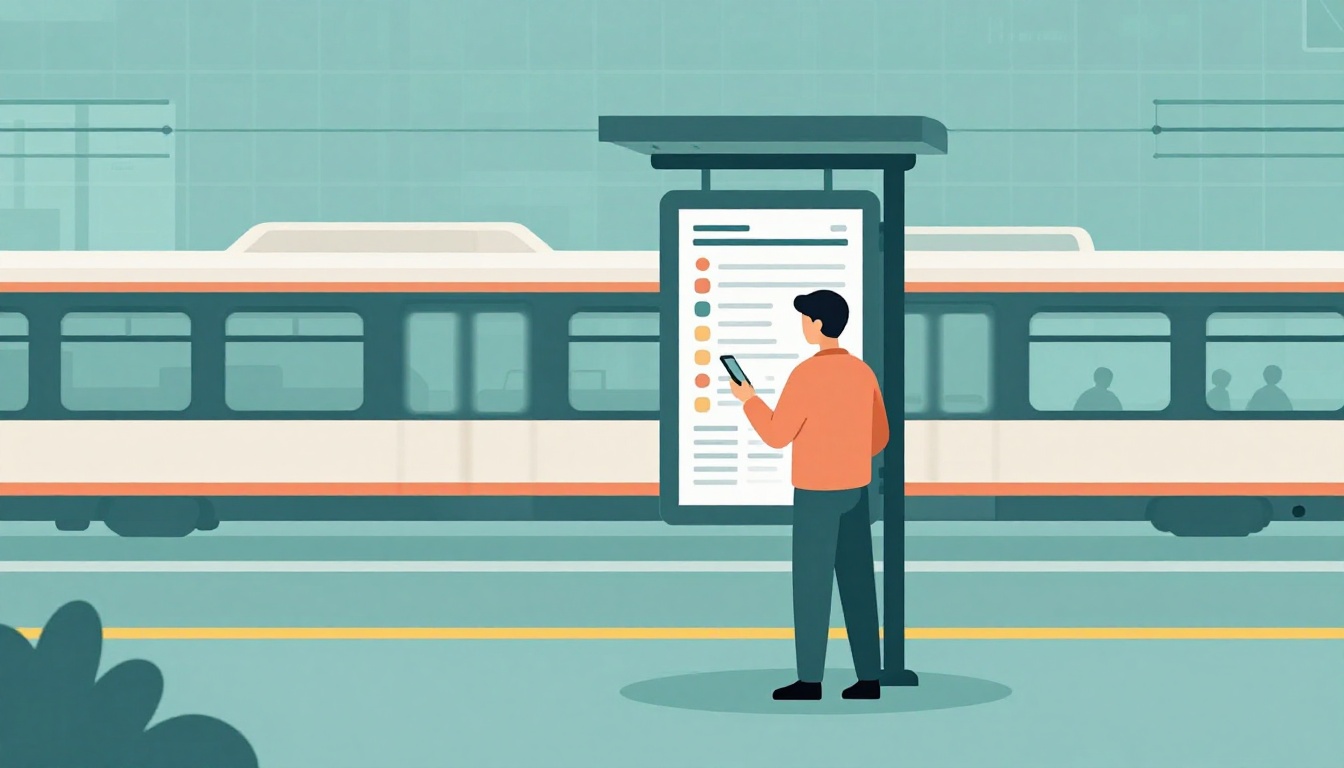
Imagine you rush to the stop, check your phone, and still miss the bus. The schedule looked “simple,” but the times and symbols didn’t match your trip. You’re not alone.
Learning to read bus and train schedules takes practice, not talent. Once you know where to look, you’ll waste less time, avoid wrong directions, and feel calm instead of stressed. That matters for commuters, students, and anyone visiting a new city.
This guide shows you how to spot the key parts fast (route numbers, time columns, stop lists). Then you’ll decode symbols and time formats without getting tricked. After that, you’ll follow a clear step-by-step method for buses and trains, plus a few real-world tips for transfers, platforms, and delays. Finally, you’ll pick the right apps and avoid the common mistakes that ruin commutes.
Spot the Key Parts of Bus and Train Schedules Right Away
Most schedules follow a pattern. If you can find the “header,” “direction,” and the part that lists stops, the rest gets easier.
Here’s what you should look for first:
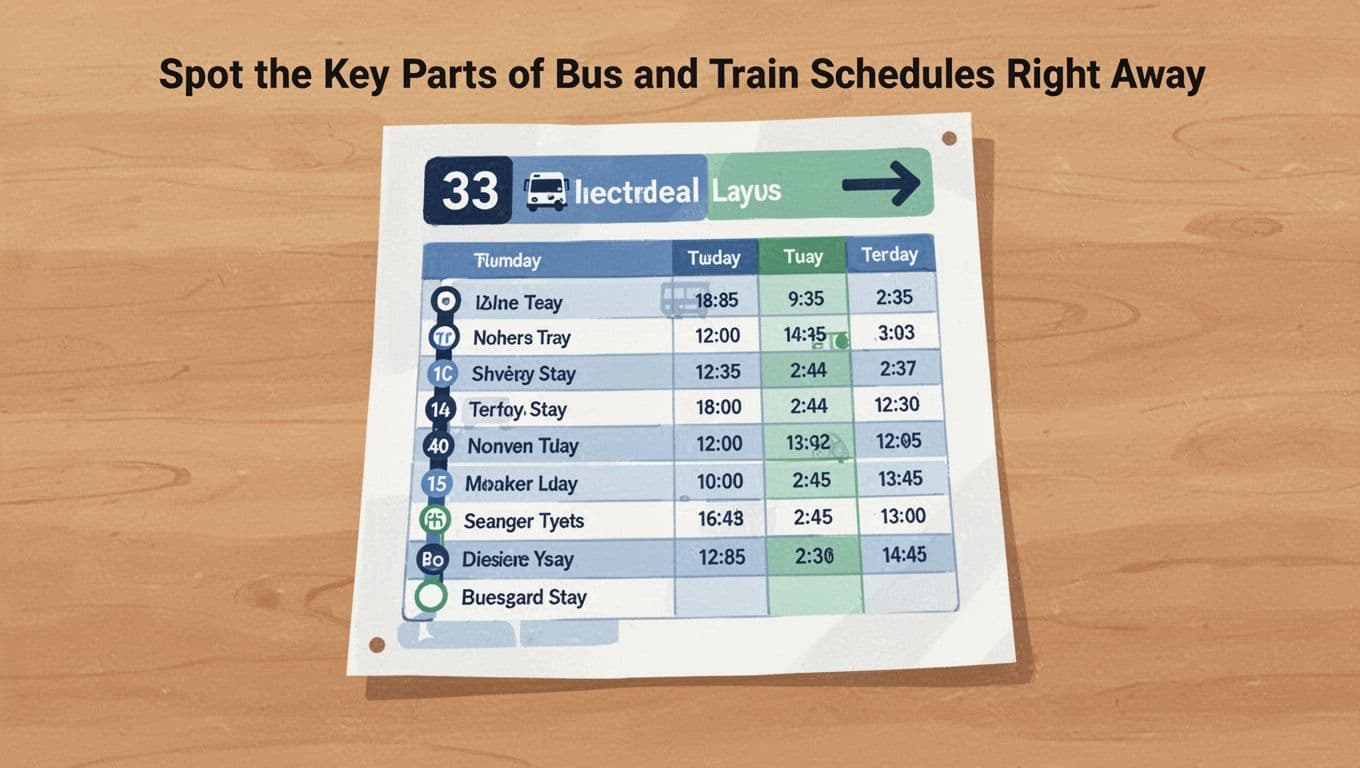
Route Numbers and Directions Made Simple
Start with the route number (like 5) and the direction. Schedules often label direction as Northbound, Southbound, Inbound, Outbound, or show an arrow.
A quick example helps. Suppose you need to go downtown:
- Route 5 Northbound runs toward downtown.
- Route 5 Southbound runs back toward the suburbs.
So even if the route number matches, the direction might not. Also, some routes loop. In that case, the schedule may show two sides of the loop (or list stops in order for one direction only). When in doubt, check the endpoint names. They tell you which way you’re riding.
Time Tables and Frequency Indicators
Next, find the days of service and the time columns. Many US agencies split schedules into weekday, Saturday, and Sunday (and sometimes holidays).
Then look for frequency info. You might see notes like:
- Every 10 minutes during peak
- Every 20 minutes off-peak
- Limited service at night
Time formats can also change. Most US schedules use 12-hour time (like 8:15 AM). Some rail schedules use a 24-hour look, especially in technical PDFs. If you’re unsure, always match the time to AM/PM or the station’s usual rhythm.
Stop Lists and Landmark Names
Finally, locate the stop list. Stops usually appear in the order the bus or train travels. Times sit next to them.
If the schedule uses plain stop names, look for landmarks too. Intersections, malls, hospitals, and stadiums often show up. When the schedule lists a “hub,” like “Central Station,” that’s usually where many riders transfer.
If you feel lost, don’t panic. Scan for the next stop ahead of you, not the last stop on the page.
Here’s a simplified example of what to read:
| Stop | Weekday time |
|---|---|
| Main St & 3rd Ave | 7:12 AM |
| Main St & 5th Ave | 7:20 AM |
| Downtown Station | 7:32 AM |
Now your job is simple: find the stop you get on, then pick a time that also lines up with your target stop.
Decode Symbols, Abbreviations, and Time Tricks
Schedules look “busy” because agencies pack in useful details. Symbols and abbreviations are meant to save time, not confuse you.
Must-Know Symbols for Accessibility and Service Changes
Treat symbols like a shortcut to the important stuff. Common US schedule icons include:
- Wheelchair accessible
- Low-floor bus
- Bike rack
- Express service
- Non-stop
- Limited stops
- Detour
- Service alert
- Holiday schedule
- No service
- Late night service
- First/last trip note
- Transfer note
Sometimes these show up as small icons at the top of a route page. For example, the MTA’s guide to riding the bus explains how accessibility features work, and what to expect during your trip.
Also watch for color changes in apps. Many transit systems show service alerts in red or orange. A printed schedule can’t update after it’s posted, but apps can.
One important habit: when you see a symbol that says holiday schedule or no service, stop and double-check your date. That’s where many riders miss their bus or train.
Abbreviations That Trip Up New Riders
Abbreviations are tiny, and they can change the meaning of a time table. Here are common ones you might see on US transit and rail pages:
- AM (morning) and PM (afternoon)
- AR (arrival)
- TD (departures or time of departure)
- EXP (express)
- LTD (limited)
- NS (non-stop)
- HLT or STP (limited stop)
- Su (Sunday), Mo (Monday), Sa (Saturday)
- H or Hol (holiday)
- Mo-Fr (Monday through Friday)
- Tu-Th (Tuesday through Thursday)
- SuSa (Sunday and Saturday)
- Cancelled (sometimes shown as a code or short note)
If your schedule mixes formats, you might also see times written like “12:10” without AM/PM. In that case, the service context matters. Early morning trips usually mean AM. Late evening usually means PM.
If you want a simple way to memorize meanings, build your own mini cheat sheet and keep it with you. When you encounter a new symbol, write it down once. After that, it becomes familiar.
Follow These Steps to Read a Bus Schedule Without Confusion
Once you know where to look, reading a bus schedule becomes a routine. Use the steps below, even if you think you’re “good at this.”
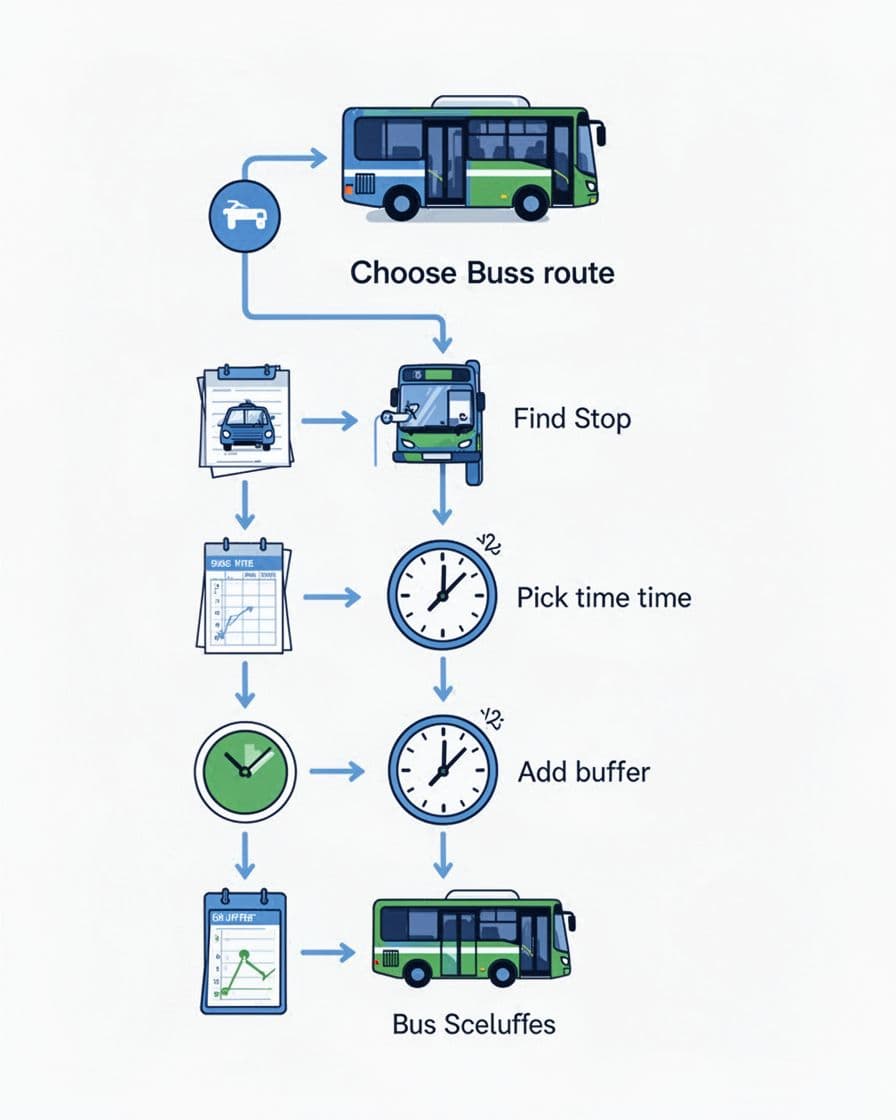
Match Your Trip to the Right Time Slot
Start by matching your trip to the schedule section that fits your day.
- Pick the right direction (northbound/southbound, inbound/outbound).
- Find your stop in the list (your boarding stop).
- Pick the departure time next to your stop.
- Check arrival at your target stop (the time should line up after your boarding stop).
Now add travel reality. Walk time matters. Sidewalks aren’t a straight line, and people slow down at corners.
Also watch for peak vs off-peak. On peak schedules, buses might come more often and run a bit faster. In off-peak, gaps can widen. That changes what “safe timing” means.
A good rule: be at the stop 5 to 10 minutes early, especially for evening trips.
Plan Transfers Between Buses Smoothly
Transfers work best when you treat connection time like a buffer, not a promise.
When you read multi-route schedules, do this:
- Find the time your first bus arrives at the transfer stop.
- Add a walking buffer to the next stop (crossing streets takes time).
- Use a realistic connection window, usually 10 to 15 minutes.
Why? Because buses run late sometimes. Also, your second route might not arrive the moment you see your first one. If the schedule shows tight gaps, plan a slightly earlier connection.
Here’s a realistic example: your first bus arrives at 5:20 PM. Your second bus shows departures at 5:25 PM and 5:45 PM. If you can, aim for the earlier one only if your walk is short and the stop is easy. If it’s a longer walk, take the 5:45 option (or choose an earlier first bus).
Crack Train Timetables for Longer Journeys
Trains can look harder because station names and numbers add detail. Still, the logic stays the same: route, direction, then times at stops.
You just get more fields.
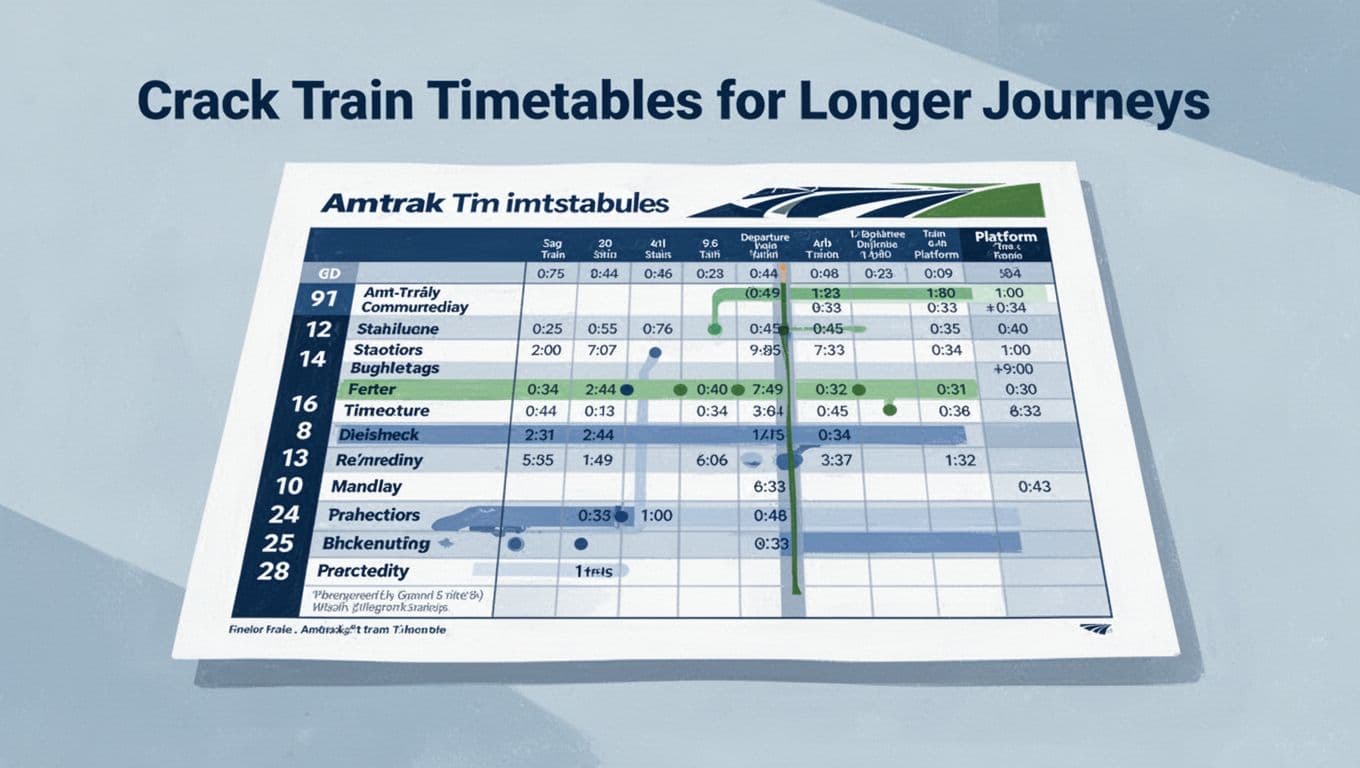
Understand Train Numbers and Classes
Train schedules often show train numbers and service types. For example, Amtrak uses route names and train numbers across timetables.
It can also show different service classes, like local vs express, or different types of service on the same line. That means two trains might run through the same big stations, but not stop at the same ones.
To see a typical Amtrak timetable format, check Amtrak schedules and timetables. Once you’ve seen how they label stops and times, other systems feel less intimidating.
Key idea: always confirm the train stops where you need. Don’t assume “same route name” means the same stops.
Track Platforms and Connection Rules
For commuter rail and heavy rail, the “platform” or track assignment can matter. Some schedules show platform numbers. Others tell you to watch for updates at the station.
In huge stations, platform assignments can shift due to delays or maintenance. That’s why station signage exists. Still, you can reduce stress by:
- Arriving early enough to find the right level or entrance.
- Checking the last trains if you’re traveling late.
- Building extra time for transfers.
If you’re connecting between rail lines, use the same buffer idea as buses. Add time for elevators and stairs. Also consider that crowds slow people down.
Supercharge Your Trips with Apps and Real-Time Tools
Paper schedules are great for planning. Real-time tools are better for the moments when traffic, weather, or crew changes affect service.
For live departures and simple tracking, Transit-style apps can help a lot. For instance, Transit app on Google Play highlights real-time tracking and alerts in many cities.
Here’s how to use apps smartly:
- Use the app to confirm the next departure near your stop.
- Turn on notifications for your routes (so delays don’t surprise you).
- Save frequent stops so you don’t search every time.
If you travel between agencies, remember that each system can have different fare rules and transfer policies. In those cases, the app can help with timing, but you still need to follow local rules.
Also consider data and battery. If Wi-Fi is weak outdoors, plan for cellular access. Bring a charger if your trip is long.
Avoid These Sneaky Mistakes That Ruin Commutes
Even experienced riders make avoidable errors. These are the most common ones in the US.
Mistake 1: Mixing AM and PM
Fix it by locating the time of day first. Morning trips usually start early. Evening trips follow a second wave later.
Mistake 2: Ignoring service splits (local vs express)
Express trains skip stops. Local trains stop more often. Always read your specific stop list and confirm it includes where you board and exit.
Mistake 3: Picking the wrong direction
Direction errors happen fast on busy lines. Check the endpoint name, not just the route number.
Mistake 4: Forgetting holidays and schedule changes
Many agencies run “holiday schedule” days. If you travel around major holidays, check your date before you leave.
Mistake 5: No buffer time for walking and transfers
If your transfer window is tight, plan for the worst case. Add time so you’re not racing across platforms.
Mistake 6: Using outdated paper schedules
Schedules can change due to detours, staffing, or track work. Before relying on paper, compare it to the current agency page.
For another plain-language example of schedule reading, see Barta’s schedule guide. The key takeaway is the same everywhere: read the route, direction, and stop times in order.
A quick practice idea: try one “dry run” today. Look up a trip you already make. Then confirm the timing matches real life.
Conclusion
You don’t need to be a transportation expert to read transit schedules. When you focus on the basics, the rest falls into place: route and direction first, stop lists next, and time slots last. After that, symbols and abbreviations become predictable instead of scary.
The best habit is simple: plan with the schedule, then confirm with real-time tools before you leave. If you do that, you’ll stop missing buses and trains for reasons you can control.
So here’s your next step. Pick one local route (bus or train), open its schedule, and find your stop in under two minutes. Then try again next week. You’ll feel the difference fast, especially the moment that “confusing” timetable finally makes sense.